You accidentally marked your skin with a permanent marker. Your child drew on themselves right before a family photo. A coworker’s Sharpie ended up on your arm during a meeting. If you’re here, you’re probably wondering: Can this really be permanent?
The good news? Despite the name, a permanent marker on skin is not actually permanent. Your skin will naturally shed the ink within 2-3 days. But if you need faster results, you have multiple safe and effective options using items you likely already have at home.
Here’s what you need to know: Marker removal is safe, simple, and fast. Most methods work in 5-15 minutes. Permanent markers are not toxic in small amounts. And yes, there are even methods gentle enough for a toddler’s face.
Let’s explore everything you need to know about removing permanent marker from your skin.
Understanding Permanent Marker & Your Skin
What Is Permanent Marker Made Of?
Permanent markers like Sharpies contain three main ingredients that make them stick to surfaces: resin, xylene, and toluene. These are the main 3 compounds that create the “permanent” label and make the ink resist water and fading.
Is Permanent Marker Toxic?
The short answer: Accidental contact with permanent marker on skin is not toxic in small amounts. Parents often panic when their child draws on themselves, but there’s no need to worry. The main ingredients in permanent markers (resin, xylene, and toluene) are only concerning when ingested or inhaled in large quantities.
8 Effective Methods to Remove Permanent Marker (Ranked by Effectiveness)
Method 1: Rubbing Alcohol (FASTEST – 5-10 minutes)
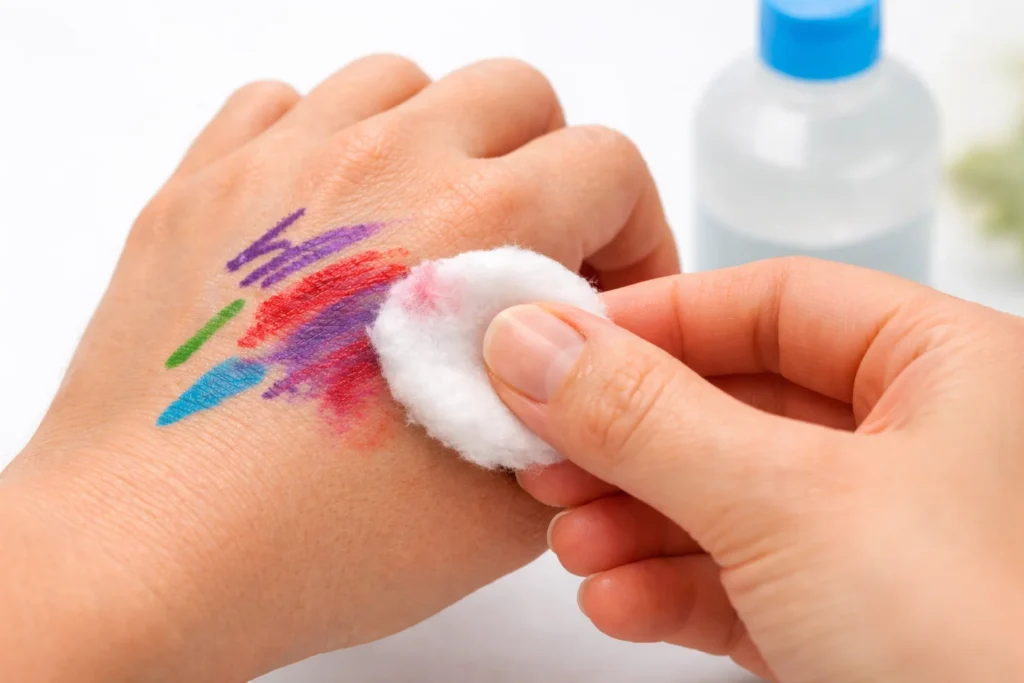
Effectiveness: ⭐⭐⭐⭐⭐
Rubbing alcohol (isopropyl alcohol) is the gold standard for quick marker removal. Why? It directly dissolves the pigments in permanent marker ink, making it one of the fastest and most reliable methods.
Why it works: The alcohol breaks down the chemical structure of marker pigments, essentially dissolving them so they can be wiped away. This is a direct chemical reaction, not just a surface fix. Cost: just $2.
Step-by-step instructions:
- Pour a small amount of 70% isopropyl alcohol onto a cotton ball or pad
- Gently rub the marked area in circular motions for 1-2 minutes
- You should see the ink immediately start coming off
- For stubborn stains, repeat with a fresh cotton ball
- Wash the area thoroughly with soap and water
- Apply a light moisturizer to prevent dryness
Timeline: First application removes about 50% of the stain. The second application gets you to 75-85%. A third application usually achieves nearly complete removal.
Best for: Large stains, hands, any non-facial areas, when you need quick results before an event
Cautions:
- Don’t use near the eyes (alcohol fumes can irritate)
- May dry skin slightly, so moisturize after
- Test on a small area first if you have very sensitive skin
- Strong smell—use in a well-ventilated area
Method 2: Baby Oil or Coconut Oil (GENTLEST – 10-15 minutes)
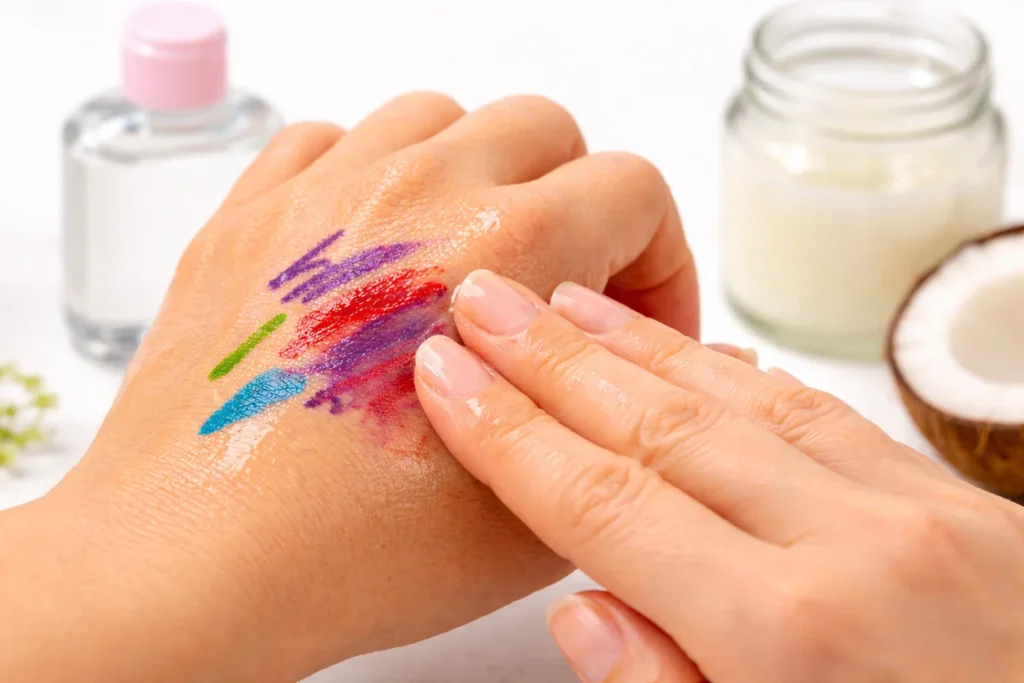
Effectiveness: ⭐⭐⭐⭐☆
If you have sensitive skin or need to remove marker from your face, oil-based solutions are your best choice. Baby oil and coconut oil are particularly gentle while still being quite effective.
Why it works: These oils bind to both your skin’s natural oils and the marker pigments, separating the ink from your skin. The oil essentially encapsulates the marker particles so they can be wiped away. Plus, the oil itself won’t irritate your skin.
Step-by-step instructions:
- Apply a small amount of baby oil or coconut oil directly to the marked area
- Gently rub in circular motions for 2-3 minutes
- Let it sit for an additional 2-3 minutes (the longer you wait, the better it works)
- Wipe away with a soft cloth or cotton ball
- Wash with regular soap and water
- Pat dry and apply more moisturizer if desired
Timeline: One application removes 60-70% of the stain. A second application usually gets most of the rest.
Best for: Sensitive skin, face, lips, around eyes, children’s faces, when you want the gentlest method possible
Cautions:
- Can clog pores if you have acne-prone skin (don’t leave on too long)
- Takes slightly longer than alcohol methods
- May feel oily on the skin initially
- For acne-prone skin, wash thoroughly after treatment
Cost: $3-8 depending on brand and size
Pro tip: Coconut oil smells better than most other options and is equally effective.
Method 3: Makeup Remover (EASIEST – 5-10 minutes)
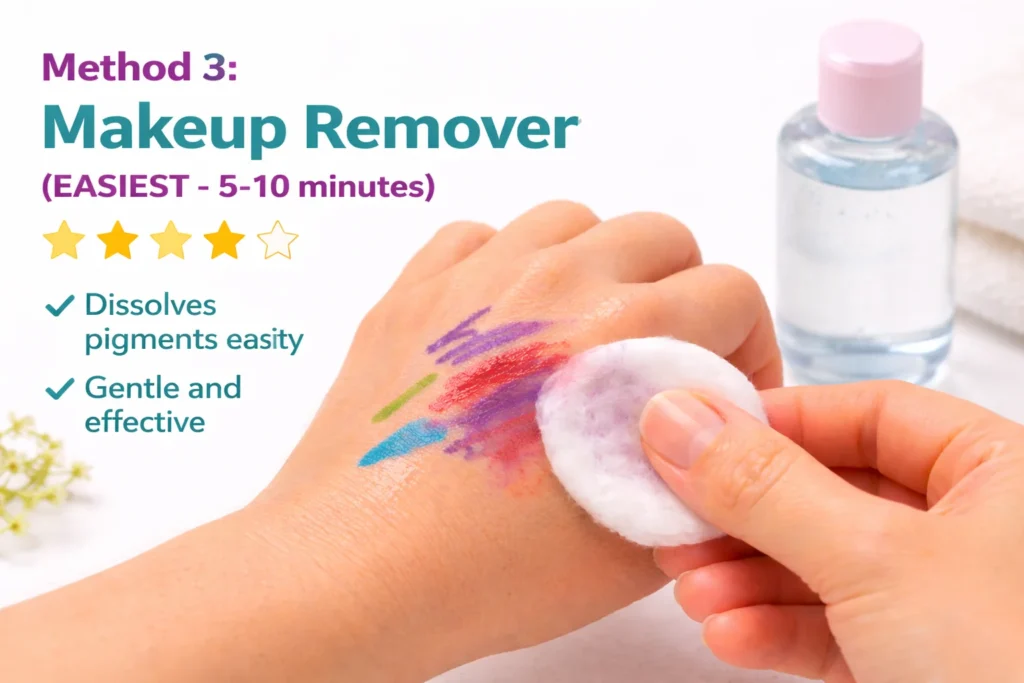
Effectiveness: ⭐⭐⭐⭐☆
Makeup remover is specifically designed to dissolve pigments from your face, making it ideal for removing makeup from facial areas. It’s gentle, readily available, and surprisingly effective.
Why it works: Makeup removers contain ingredients designed to break down cosmetic pigments and oils. These same properties work on permanent marker pigments, making it a purpose-built solution.
Step-by-step instructions:
- Apply makeup remover to a cotton ball or pad
- Gently rub the marked area for 1-2 minutes
- Wipe clean with a fresh cotton ball
- Rinse with cool water
- Apply a gentle moisturizer
Timeline: Usually removes 70-80% of the stain in one application. A second application handles most remaining markers.
Best for: Face, quick removal, sensitive skin, around eyes, lips, and anyone who already has makeup remover at home
Cautions:
- Always test on a small area first
- Some formulas may irritate sensitive skin
- Wash off completely after use
- Don’t use eye makeup remover directly on eyes (stick to lids and surrounding area)
Cost: $3-10 for a bottle that lasts many applications
Method 4: Sea Salt Scrub (NATURAL – 10-15 minutes)
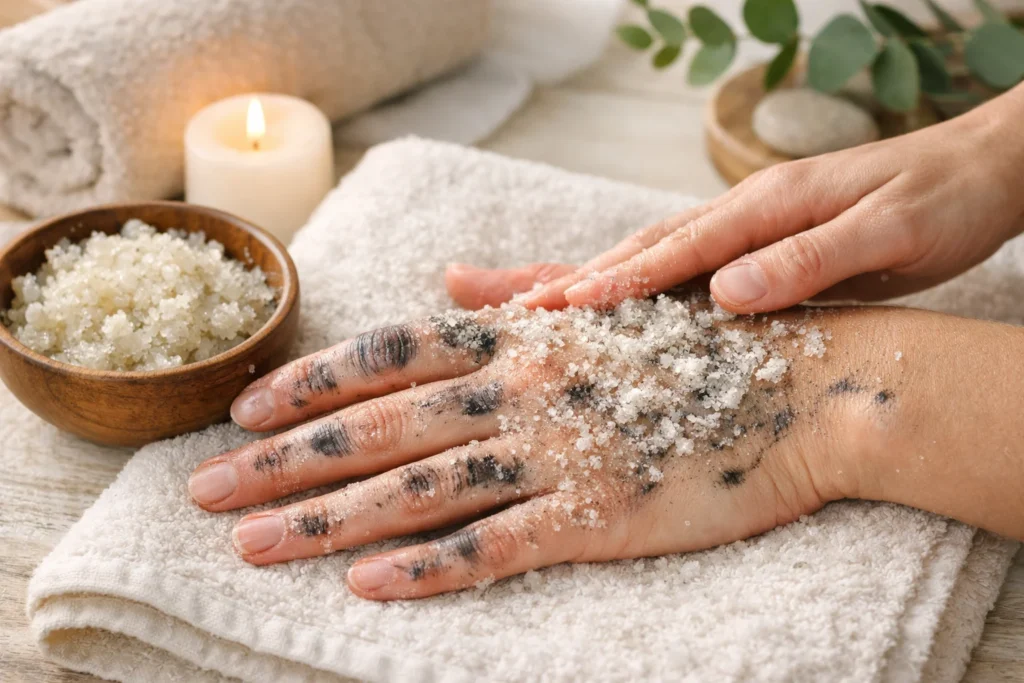
Effectiveness: ⭐⭐⭐☆☆
Sea salt works through gentle exfoliation—removing the top layer of skin that the marker is sitting on. It’s a natural, chemical-free method that’s particularly appealing if you prefer avoiding alcohol or oils.
Why it works: The salt crystals gently remove dead skin cells (and the marker on them) through mild abrasion. This is pure physical exfoliation without harsh chemicals.
Step-by-step instructions:
- Mix equal parts sea salt and warm water to create a paste
- Apply to the marked area
- Gently massage in circular motions for 3-5 minutes
- Let’s sit for an additional 5 minutes
- Rinse thoroughly with warm water
- Pat dry and apply moisturizer
Timeline: First application removes 40-50% of the stain. A second application the next day can remove more.
Best for: Hands, arms, natural approach, people who prefer not to use chemicals
Cautions:
- Never scrub hard (gentle massage only)
- It can irritate if you have open cuts or very sensitive skin
- Takes longer than other methods
- Don’t use on the face or sensitive areas
- Less effective on very dark/stubborn stains
Cost: <$1 (sea salt is very inexpensive)
Method 5: Whitening Toothpaste (COMMON – 10-15 minutes)
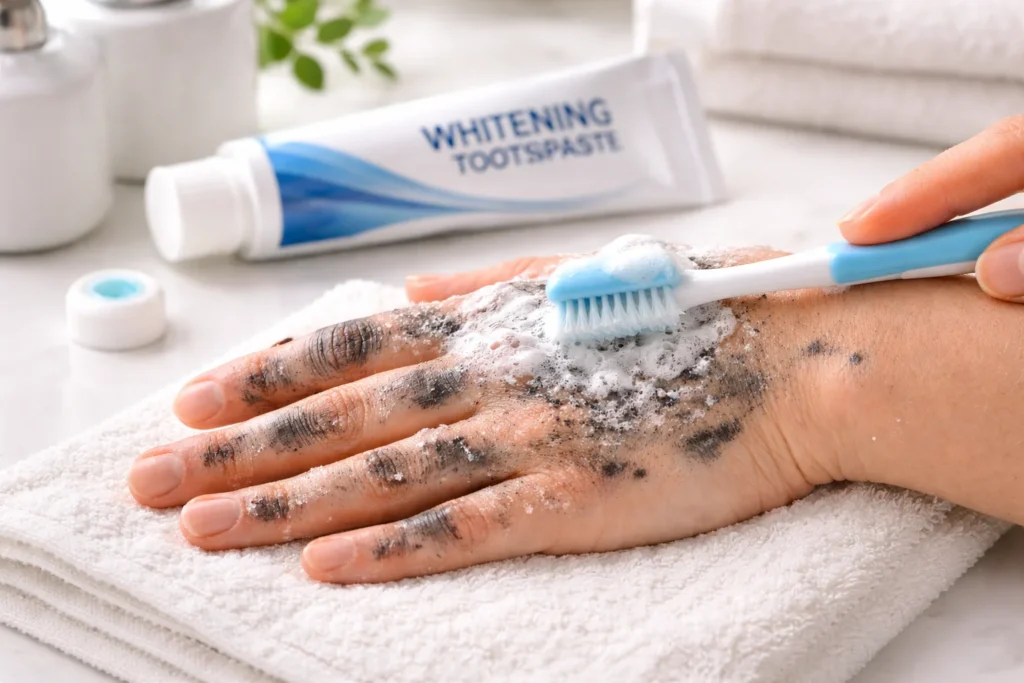
Effectiveness: ⭐⭐⭐☆☆
Whitening toothpaste contains mild abrasive ingredients and mild chemicals designed to remove surface stains. These same properties work on marker stains, and most households already have toothpaste available.
Why it works: Whitening toothpastes contain mild abrasives (like silica) and chemical agents that work on both the physical stain (through gentle exfoliation) and chemical level (breaking down pigments).
Step-by-step instructions:
- Apply whitening toothpaste directly to the marked area (non-gel only)
- Use a soft toothbrush to gently massage in circular motions for 2-3 minutes
- Let’s sit for an additional 3-5 minutes
- Rinse thoroughly with warm water
- Dry and apply moisturizer
Timeline: First application removes 50-60% of the stain. A second application can remove most of the rest.
Best for: Hands, arms, when you don’t have other supplies, and anyone with a toothbrush readily available
Cautions:
- Use whitening toothpaste (regular toothpaste is less effective)
- Use a soft toothbrush only—not hard bristles
- Don’t scrub aggressively
- May be too abrasive for sensitive skin
- Don’t use it on the face
Cost: Most people already own toothpaste; if buying new, <$5
Pro tip: Using a new soft toothbrush designated for this purpose works better than a worn brush.
Method 6: Dish Soap & Baking Soda Paste (STRONG – 10-20 minutes)
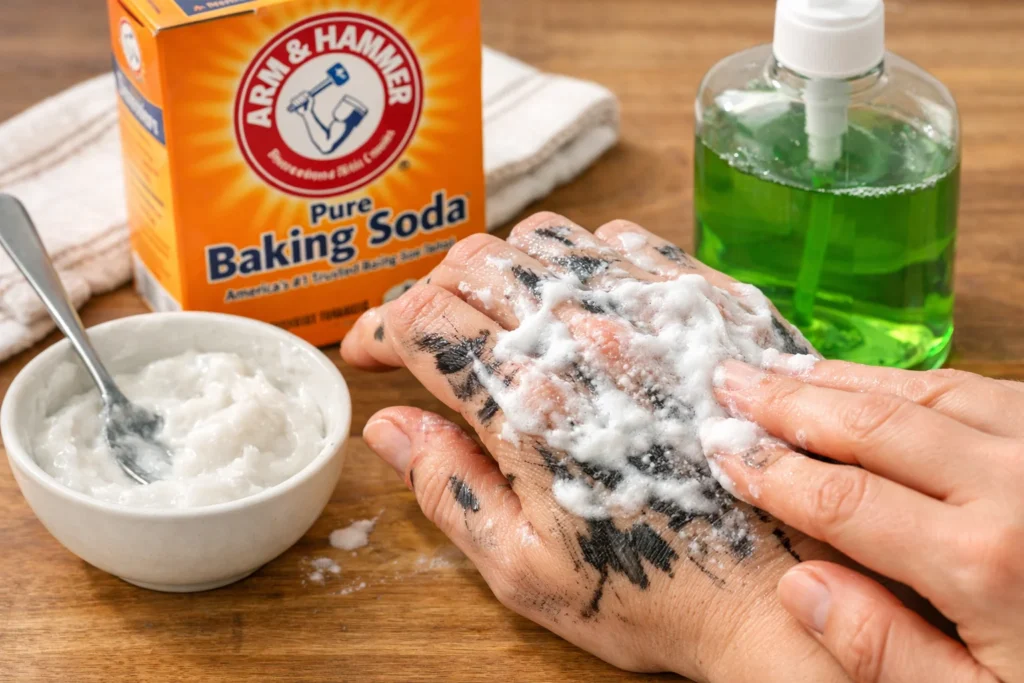
Effectiveness: ⭐⭐⭐☆☆
This combination is powerful because it works on two fronts: the baking soda provides gentle exfoliation while the dish soap breaks down the chemical structure of the ink. It’s a popular home remedy recommended by dermatologists.
Why it works: Baking soda acts as a gentle exfoliant, removing the top layer of skin with the marker on it. Dish soap breaks down the oils and chemicals in the marker pigments. Together, they’re more effective than either alone.
Step-by-step instructions:
- Mix 1 part dish soap with 2 parts baking soda to create a paste
- Apply to the marked area
- Gently massage in circular motions for 3-5 minutes
- Let’s sit for 5-10 minutes
- Rinse thoroughly with warm water
- Dry completely and apply moisturizer
Timeline: One application removes 60-70%. A second application addresses most of what remains.
Best for: Hands, stubborn stains, budget-conscious removal, hands before important events
Cautions:
- Not suitable for the face or sensitive areas
- Can be slightly drying, always moisturize after
- The smell may be strong
- Don’t use on broken skin
- Baking soda can be too abrasive for very sensitive skin
Cost: <$1 (both items are pantry staples)
Method 7: Nail Polish Remover (POWERFUL – 5-10 minutes)
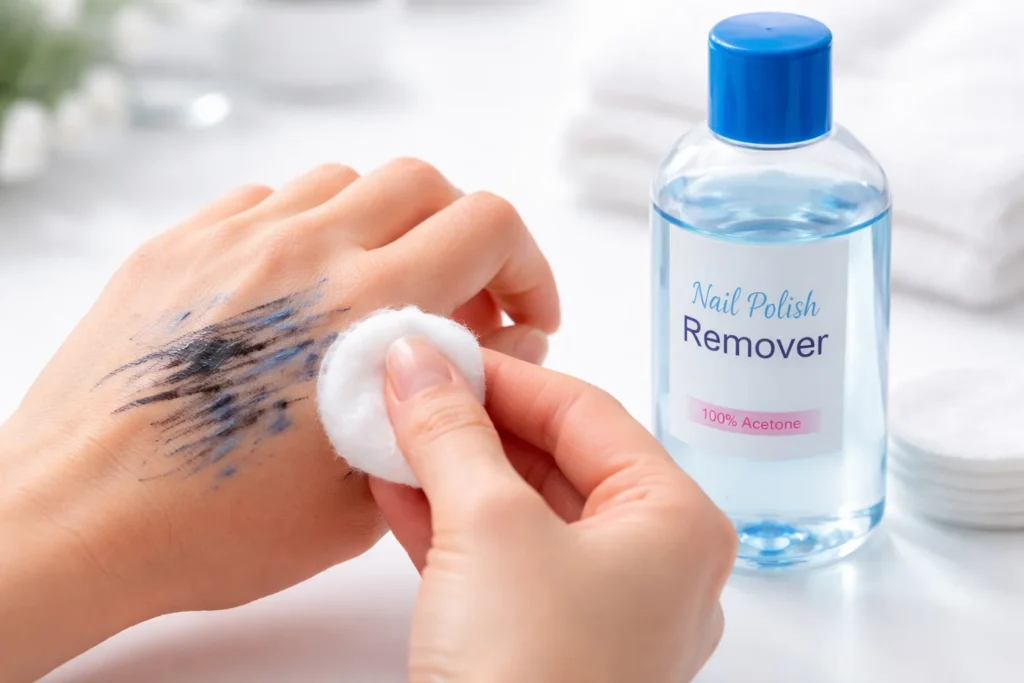
Effectiveness: ⭐⭐⭐⭐⭐
Nail polish remover containing acetone is extremely effective at dissolving marker pigments. It’s one of the fastest methods, though it’s also one of the strongest and should be used carefully.
Why it works: Acetone dissolves both the resin and pigments in permanent markers very efficiently. It breaks down the chemical structure directly, making the marker essentially melt away.
Step-by-step instructions:
- Pour a small amount of acetone-based nail polish remover on a cotton ball
- Press firmly against the marked area for 10-20 seconds
- Rub gently in circular motions for 1-2 minutes
- Repeat with a fresh cotton ball if needed
- Wash the area thoroughly with soap and water
- Apply moisturizer immediately (acetone dries skin)
Timeline: First application removes 80-90% of the stain. A second application removes nearly all remaining markers.
Best for: Hands only, very stubborn stains, when you need a fast result,s and don’t mind a strong smell
Cautions:
- NEVER use on the face—acetone can damage sensitive facial skin
- Strong chemical smell—use only in well-ventilated areas
- Can irritate or dry skin, so use minimally
- Do not use if you have very sensitive skin
- Moisturize thoroughly afterward
- Keep away from the eyes and lips
- Not recommended for children’s hands
Cost: $3-7 for a bottle (lasts many uses)
Method 8: Milk (SURPRISING – 15-30 minutes)
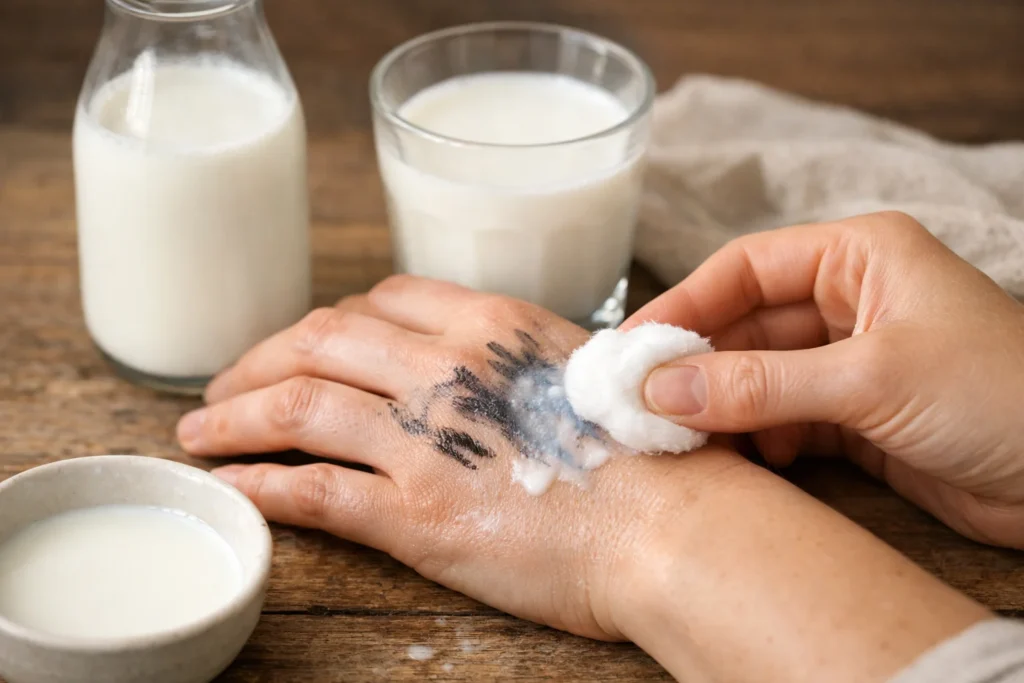
Effectiveness: ⭐⭐☆☆☆
This method sounds unusual, but milk actually works through a chemical reaction with marker ink. It’s the gentlest method available and has a pleasant smell compared to harsh chemicals.
Why it works: Milk proteins and fats have a molecular interaction with permanent marker pigments. While the science isn’t completely understood, dairy products are known to break down marker stains through a combination of chemical and physical processes.
Step-by-step instructions:
- Soak a cotton ball in whole or 2% milk
- Press against the marked area for 15-20 seconds
- Rub gently in circular motions for 2-3 minutes
- Let sit for 10-15 minutes (longer is better)
- Wipe away with a fresh cotton ball
- Repeat if needed
- Wash with soap and water
- Pat dry
Timeline: First application removes 30-40%. This method requires patience—multiple applications over 15-30 minutes work best.
Best for: Sensitive skin, children, when you have time, if you prefer natural/food-based solutions, anyone bothered by chemical smells
Cautions:
- Takes the longest of all methods (30+ minutes for complete removal)
- Least effective method overall
- Milk can smell after sitting on the skin. Wash well after treatment
- Still effective, just requires patience
- May need multiple applications
Cost: <$1 (most homes have milk)
Method Effectiveness Comparison Chart
| Method | Speed | Gentleness | Cost | Best For | Cautions |
|---|---|---|---|---|---|
| Rubbing Alcohol | 5-10 min | Medium | <$2 | Quick removal, large areas | Not near the eyes |
| Baby Oil | 10-15 min | Very High | $3-8 | Sensitive skin, face | Don’t use on acne-prone skin |
| Makeup Remover | 5-10 min | High | $3-10 | Face, quick removal | Patch test first |
| Sea Salt Scrub | 10-15 min | High | <$1 | Hands, natural approach | Don’t scrub hard |
| Toothpaste | 10-15 min | Medium | <$5 | Hands are a common item | Not on face |
| Soap & Soda | 10-20 min | Medium | <$1 | Hands, stubborn stains | Not on face |
| Nail Remover | 5-10 min | Low | $3-7 | Stubborn stains | Hands only, drying |
| Milk | 15-30 min | Very High | <$1 | Sensitive skin, patient | Slowest method |
Removing Marker from a Child’s Face or Lips
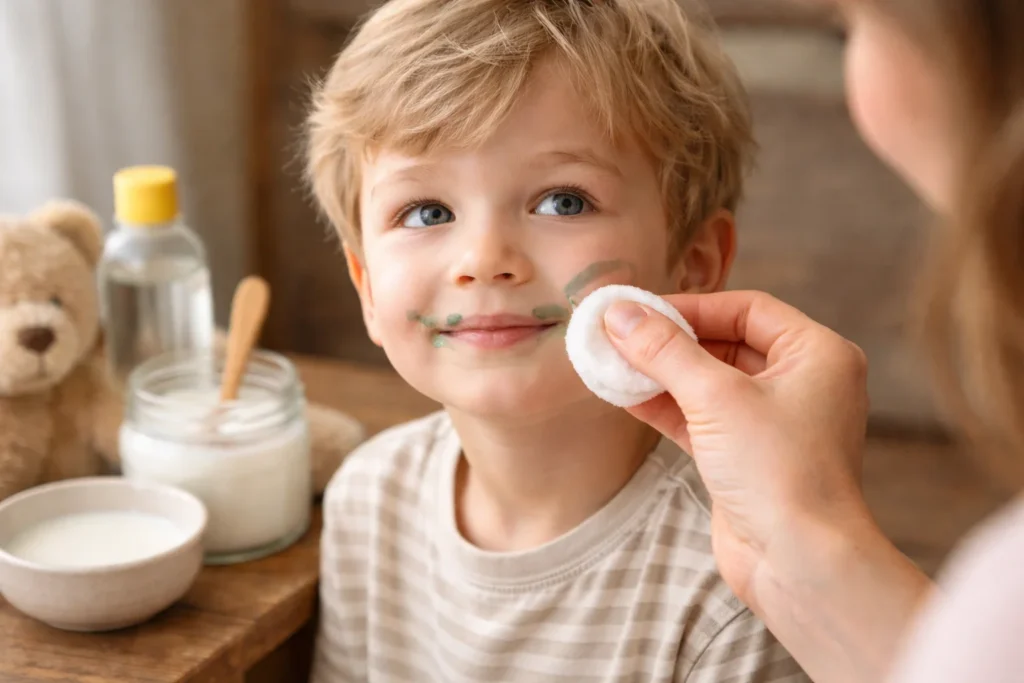
When the marker ends up on your child’s face (especially near the eyes or mouth), safety becomes the top priority. The skin on the face is more sensitive than on the hands, and children may resist rubbing.
Best methods for a child’s face:
- Makeup remover (designed for facial skin)
- Baby oil or coconut oil (gentlest options)
- Milk (safest if the child might lick it off)
Methods to AVOID on face:
- Rubbing alcohol (harsh on facial skin)
- Nail polish remover (too strong)
- Toothpaste (too abrasive)
- Baking soda/dish soap paste (irritating to face)
Timeline for child’s face: 10-20 minutes using gentle methods
What NOT To Do (Common Mistakes)
Harsh Methods to Avoid
- ❌ Bleach: Why it doesn’t work: Bleach is designed to kill bacteria and remove color from fabric, not to remove surface stains from skin. It will damage your skin more effectively than it removes the marker.
Risks: Chemical burns, severe irritation, permanent skin damage, health hazard
- ❌ Harsh scrubbing: Why it doesn’t work: Scrubbing aggressively doesn’t remove the marker faster. It just damages healthy skin and causes redness and irritation.
Risks: Abraded skin, bleeding, infection risk, prolonged redness
- ❌ Baking soda alone: Why it doesn’t work: While effective in the paste form, baking soda alone (especially with water) is too abrasive.
Risks: Irritated, raw-feeling skin, damage to sensitive skin
- ❌ Industrial solvents (WD-40, paint thinner, etc.): Why it doesn’t work: These are designed for industrial materials, not skin, and will cause serious harm.
Risks: Chemical burns, systemic toxicity, severe skin damage, medical emergency
- ❌ Super hot water: Why it doesn’t work: Heat can help open pores, but excessively hot water damages your skin barrier.
Risks: Burned skin, increased sensitivity, barrier damage
- ❌ Using on open wounds or sunburned skin: Why it doesn’t work: Injured skin can’t protect itself from chemical irritation.
Risks: Infection, severe pain, delayed healing, scarring
My Recommendation
Start with DIY methods. You likely have everything you need at home right now. The methods work just as well as commercial products (often better), and you’re spending under $1. Only buy commercial products if you have frequent marker incidents or prefer a pre-made product for convenience.
The Bottom Line
Permanent marker on skin is not dangerous, not permanent, and easily removed. You have multiple safe options that use household items and cost less than a dollar. Choose based on your priority, speed, or gentleness, and you’ll have the stain gone in under 30 minutes.
Don’t panic if your child draws on themselves. Don’t stress if you accidentally mark your skin. It happens to everyone, and it’s completely fixable.
Medical Disclaimer: This article is for informational purposes only and should not be considered medical advice. While permanent marker contact is generally safe, individual reactions vary. If you develop a severe allergic reaction, persistent rash, or unusual symptoms after permanent marker contact, consult a healthcare professional. Always test any removal method on a small area first if you have sensitive skin or known allergies.